

Playable Prototype
Almost there!
What's Due Feb 27
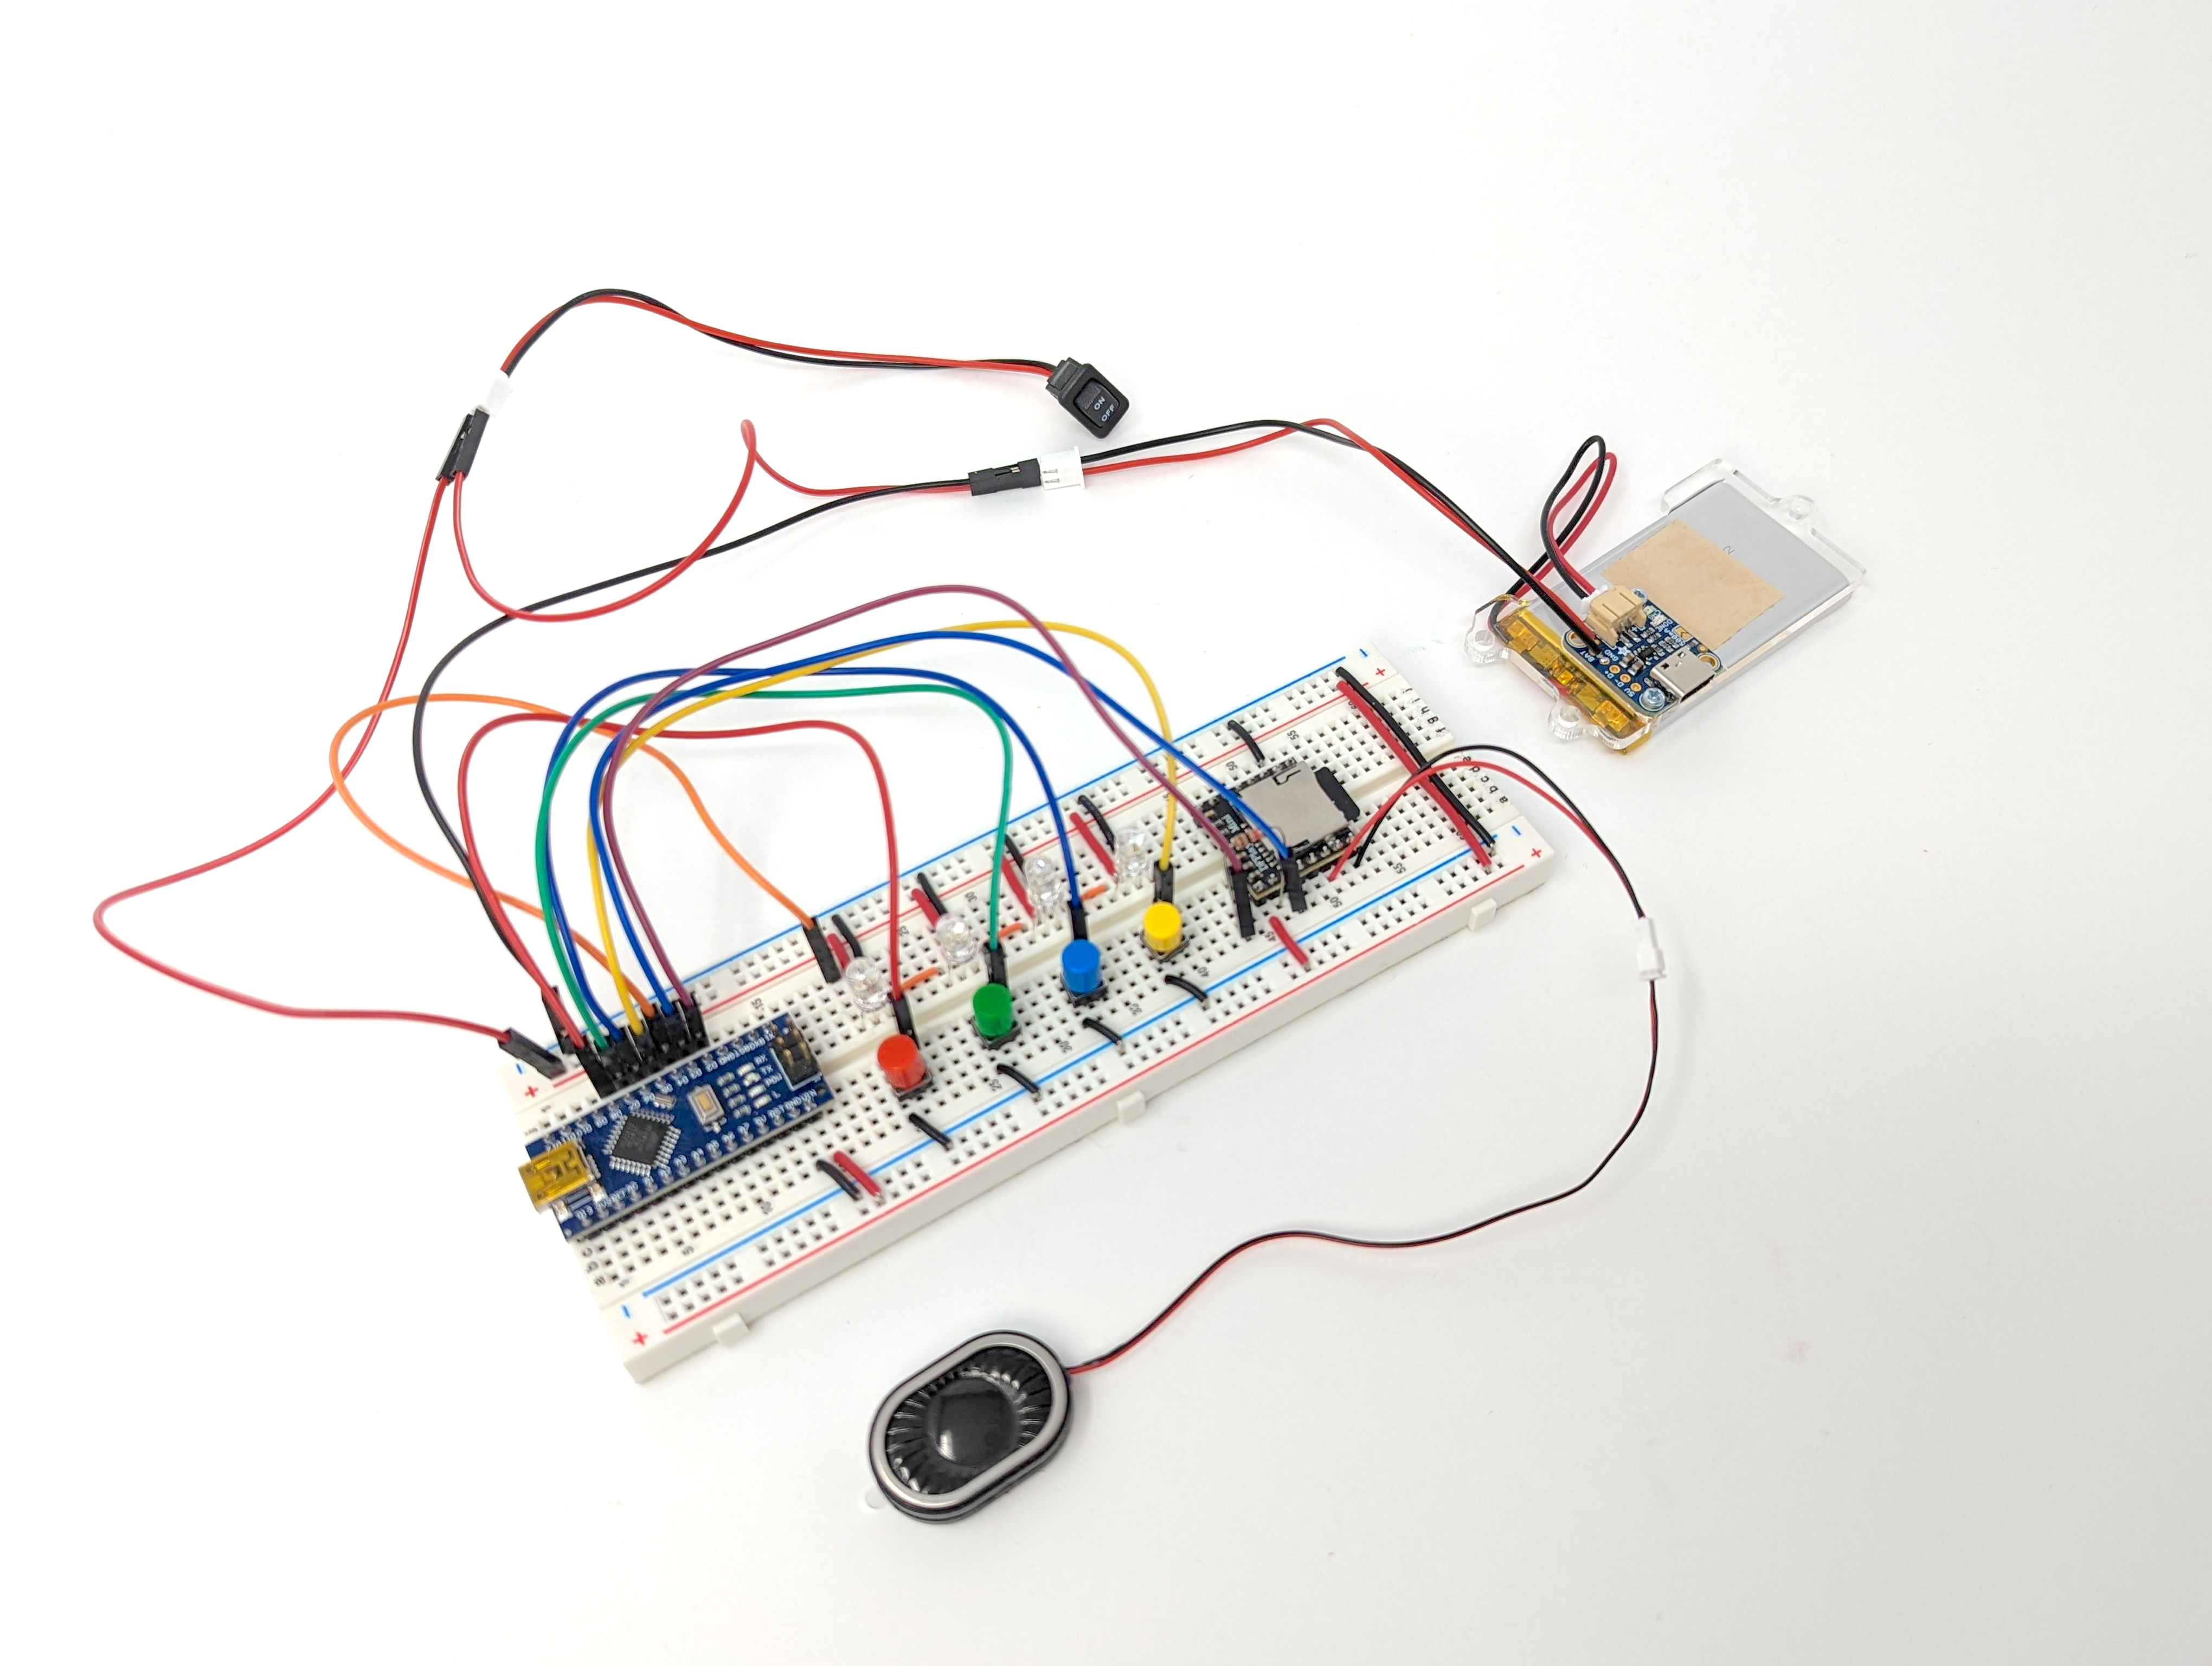
Now that we have our power module, let's attach it to the rest of the circuit! Below is the diagram of what we're trying to wire up.

- Make sure the power switch is OFF.
- Next, add a jumper wire (color doesn't matter) between the red wire (JST connector-terminated) of the charging circuit to the black wire (JST connector-terminated) of the switch.
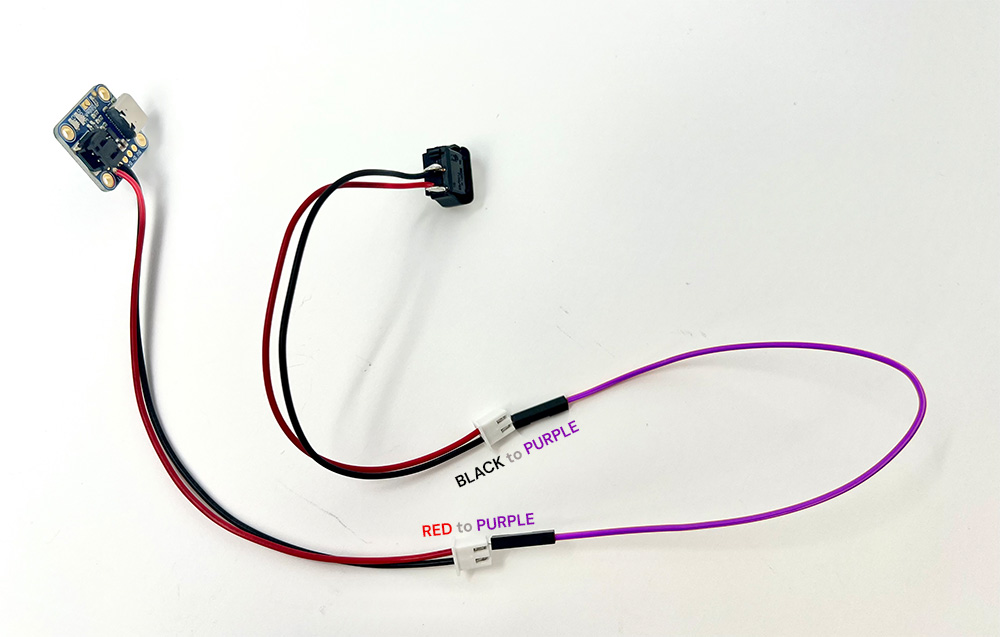
Now we're left with two unused JST connections.
- Unplug the USB mini connection to the Arduino Nano.
- Connect the red of the power switch to any point of the 3.7v power rail using a red jumper
- Connect the black of the charging circuit to any point of the GND power rail using a black jumper
- Important: Because we're now working with the battery, you'll want the Arduino's Vin to be connected to the power rail. Remove the Arduino's 5v to Ground rail connection if it is there.
This jerry-rigged setup is not the best but will work for prototyping purposes. The Dupont jumpers aren't intended to go into the JST connectors; in the final product, these JST connectors will seat into the appropriate receptacle on the final PCB. Your final product should look something like the below.
Debugging
At this point, you should still have the 'audio' test code on your Arduino Nano. If you flip the switch to on, (making sure the computer is NOT connected to the Arduino), you should hear the audio clip play!
If you don't hear anything, don't fret. Breadboards can be finicky and this is all part of the process. Press the reset button once on the Arduino Nano, and give it a few seconds. Sometimes, the power-up part draws more power than expected. Other things to try if it still doesn't work:
- Turn the switch off before you modify anything, especially if it involves moving power around!
- Double check all the wiring and connections to make sure nothing has come loose since you last worked on this part. Ask a teammate to double check for you
- Plug the Arduino Nano into your computer. Sometimes this can help stabilize the power problems
- Try a different battery (is yours dead?)
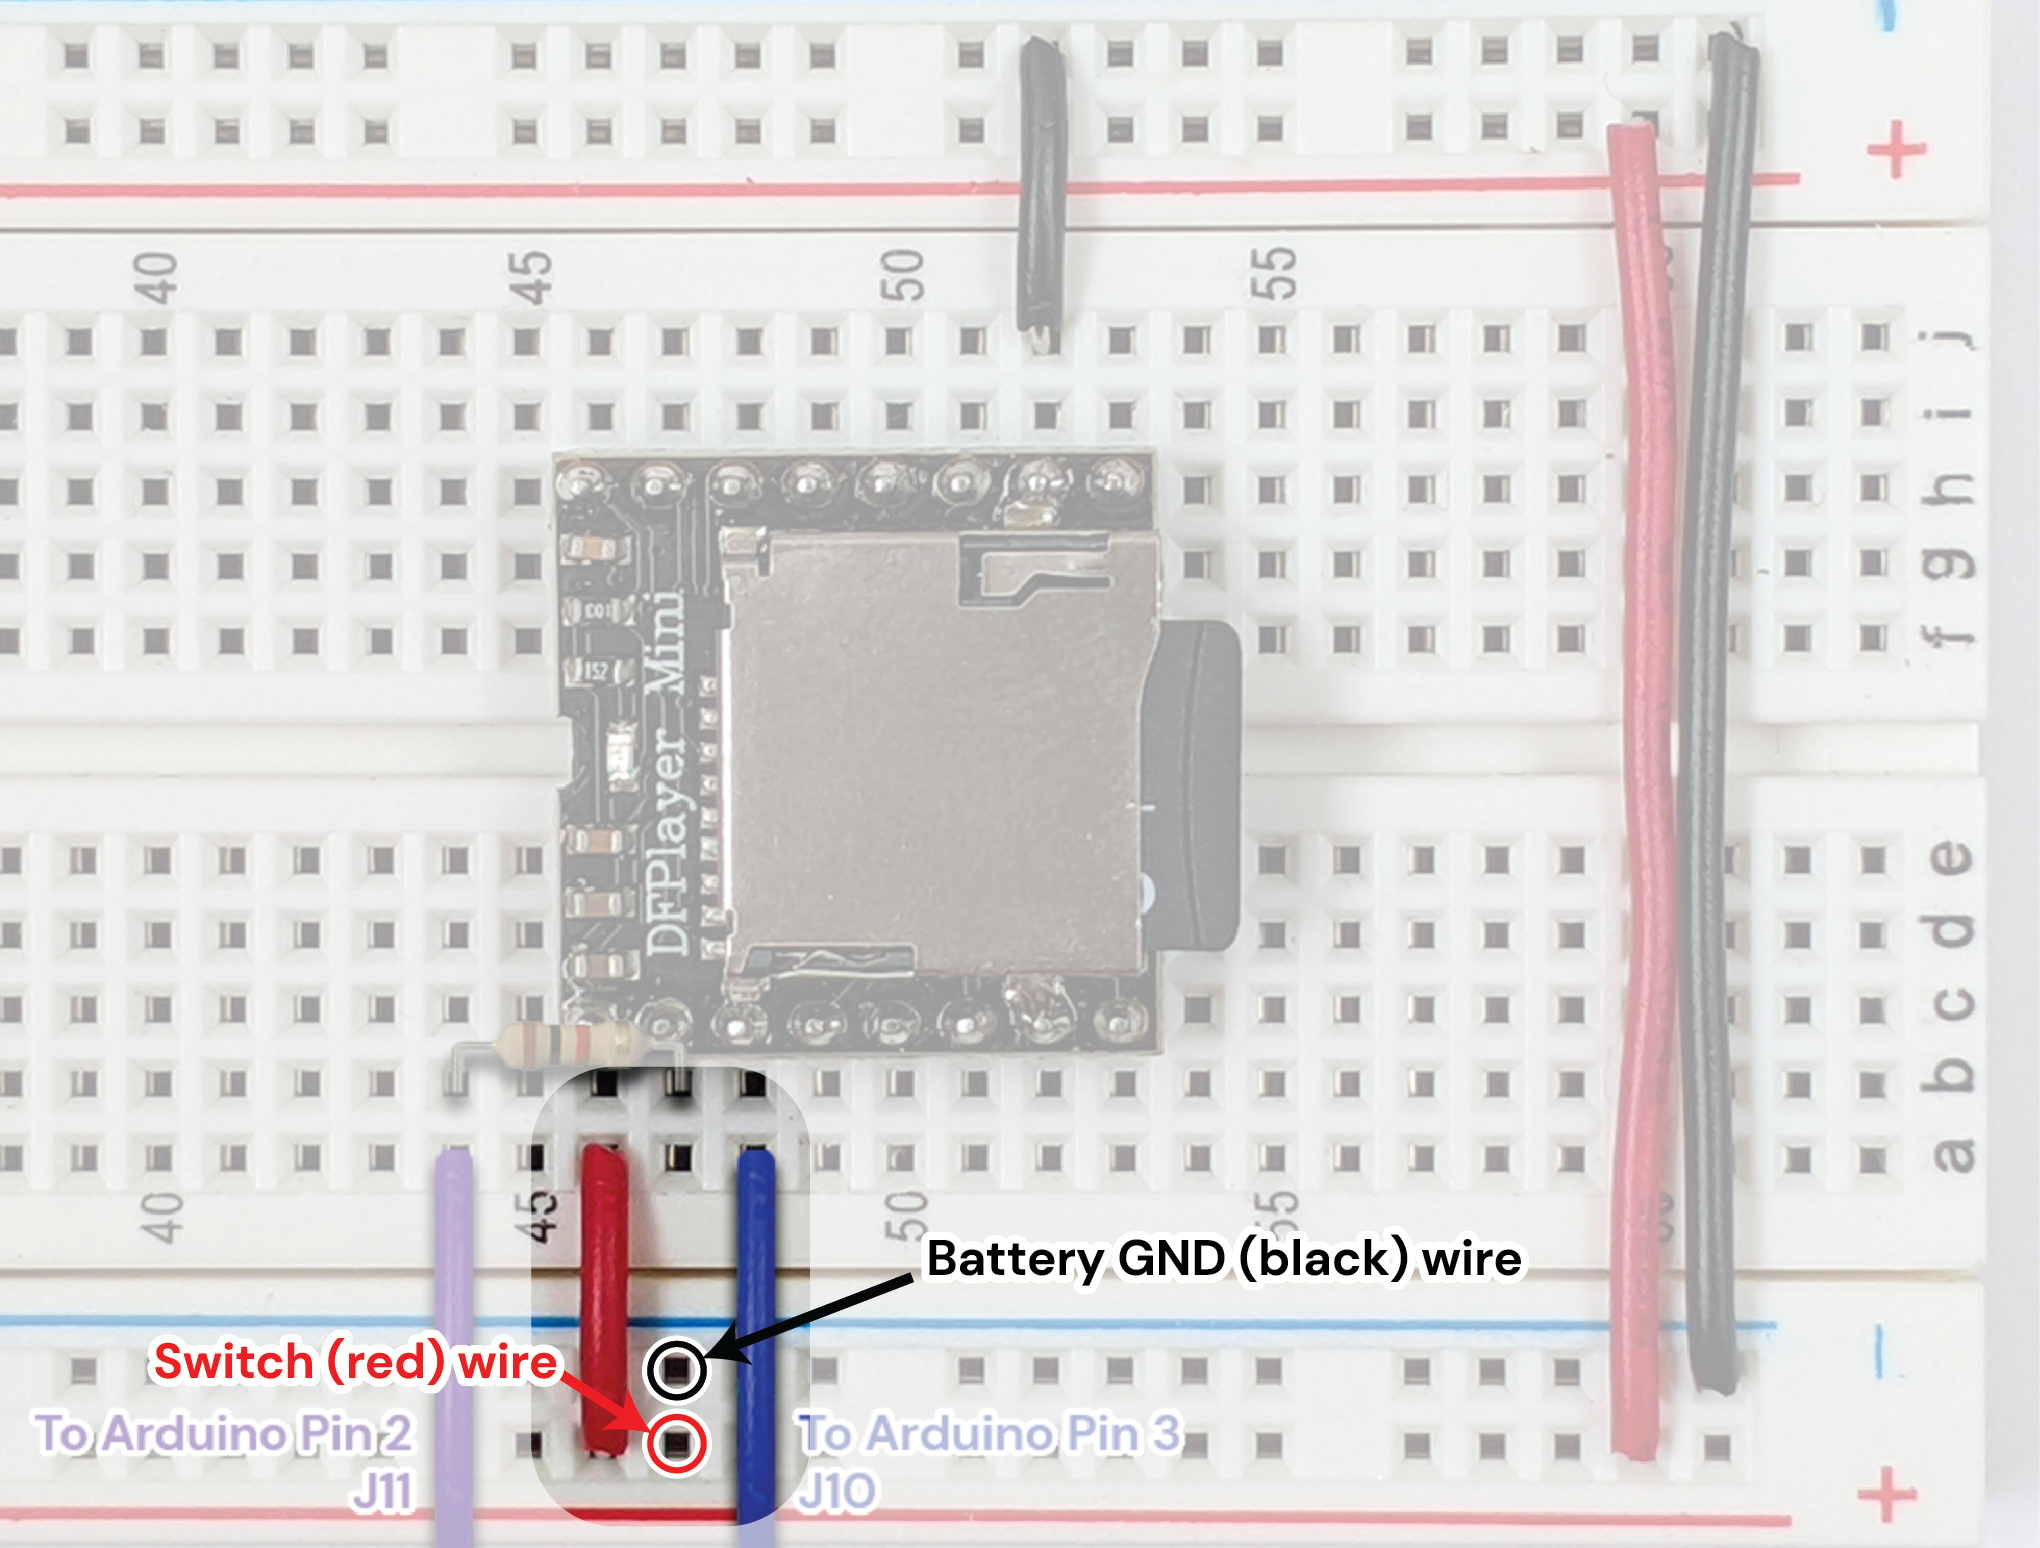
- Move the power that's coming into the board from the battery closer to the Audio player, as shown in the image below. Having the battery power enter the breadboard physically as close as possible to the audio player chip reduces the distance through the breadboard the current has to flow through.
- Still having problems? As always, please feel free to reach out on #ask-the-tas